|
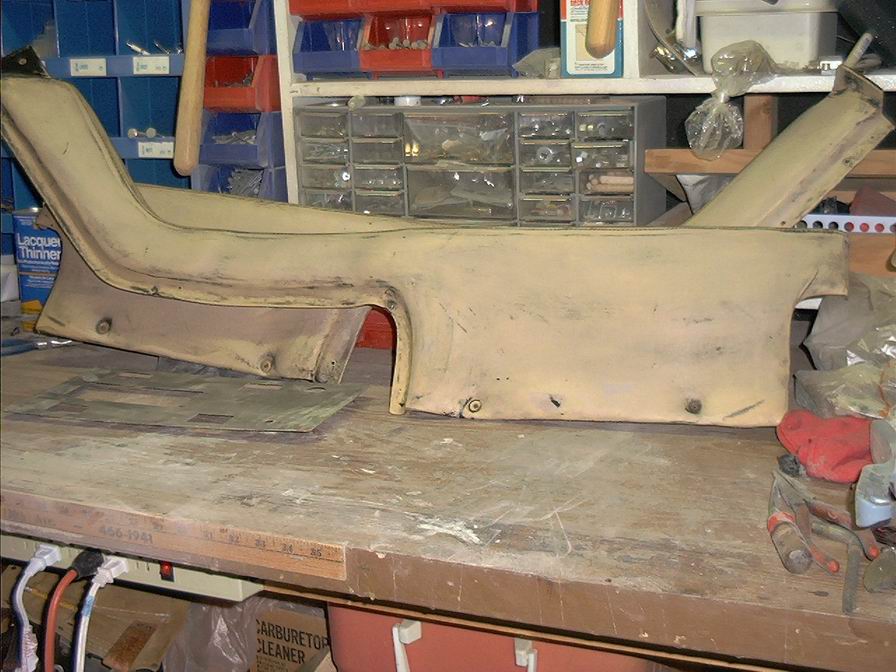
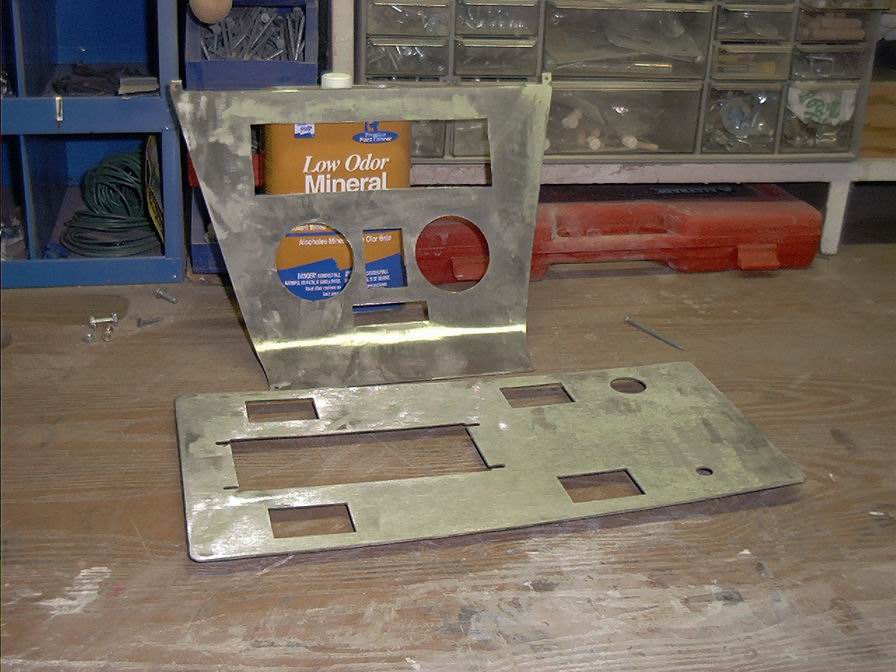
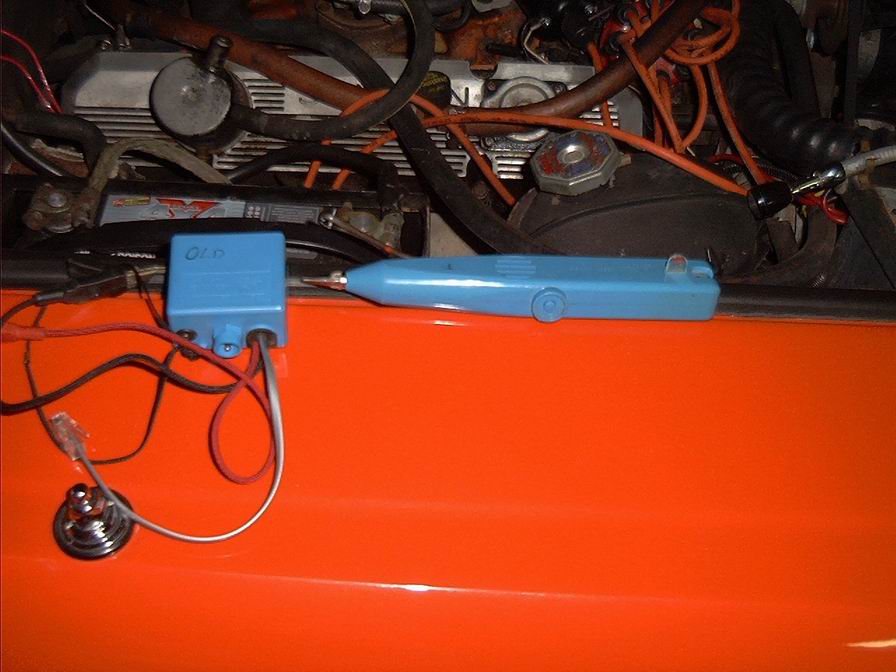
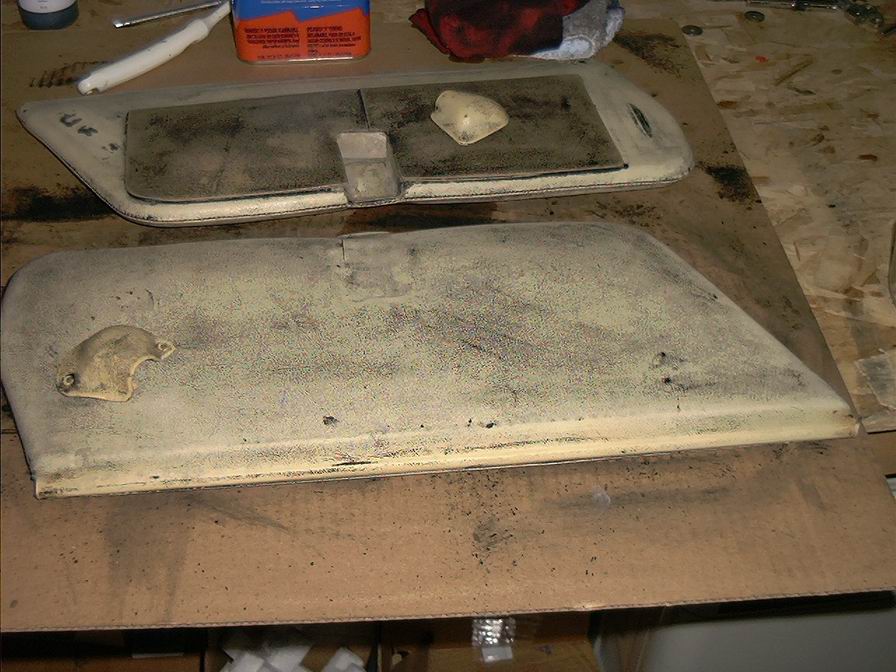
July 2003 Well the car passed the emission test, but is still stumbling between 1500 and 2500 RPMs. Have submitted a question to the JOC group asking what it might be. I'm beginning to think the tech that rebuilt the carb didn't do any tuning for altitude. He seems to think the distributor shaft is bent. I'm not so sure. The reply I received from David Crowne seemed to make sense. You can see his reply in my tech section. Anyway I've now ordered a new Edelbrock 1406 carb (600 CFM), linkage kit, and a calibration kit from Jegs.com. I'm starting to learn more about carburetors than I ever thought I would. Another answer I got was suggesting the coil might be "leaking" at higher RPMs. I could belive that too. The coil is rusted in some spots and just doesn't look good in general. I'm going for electronic ignition soon after the carb. Removed the battery and found the main connections between the dash and engine electrical components. Cleaned all the connectors. Looks like mostly original wiring. Not too bad. There is one wire going from the coil to the dash that isn't on a wiring diagram. Come to find it's for the tach. Stared at the wiring chart for a while getting familiar with what's where. Noticed two loose wire ends near the distributor. Broke out the continuity tester and found they both go to a single contact on the alternator. The wiring chart seems to indicate these wires go to things that aren't on this car. One was a solenoid on the SP and the other… I forget. Doesn't seem to be hurting anything though. Left them there as they're taped in the harness. Got a better understanding of how the blower motor is wired and connected to the resistors just below. Will tackle that project this fall probably. Still having trouble with the Carter carb. Thought I'd play with it a bit since I had a new one on order. Big mistake. Screwed up the idle mixture and now it hardly idles. Have looked on line for tips and instructions on adjusting the idle screws. Not much out there. Surprising, I think. Found a little info suggesting gently tightening the screws until they stop, then backing out two turns each and go from there. Got it running a little better, however I think the plugs are fouled now. Needed to replace them anyway I guess. Removed the right front seat in preparation for taking apart the console. Not sure what's holding all this together. Will have to do some reading. Keri at K&D was kind enough to send an article written by Doug about how to take apart the dash. Looks like quite the project. Today I changed the plugs and coil. Good excuse to buy more tools. I needed a swivel to get to the plugs. Found I had fouled the plugs to the nth degree. Some of them were still wet. Pretty hot out today. Was dripping after changing the plugs. Replaced the bushings on the loose oil filter mount. Seems pretty tight now. Took the car out to get gas and to see how it runs. It was cutting out while driving down the street. While sitting at the neighborhood exit, it died. Restarted a couple of times but no go. Backed up to the curb and figured it was out of gas even though the gauge showed Ľ tank. Just won't fire at all. A neighbor was kind enough to volunteer some fuel and another offered a ride. After cranking to get fuel to the carb, it fired up right away. Idling smoothly. Seems to still have the stumbling but not as bad. Better all the time. Started to take apart the console. Some hidden screws. Have removed the side rails and prepped them for a re-dye. Found the veneer is applied to a metal base. Will have to find someone to redo that. I have tons of oak burl, but no way to get it that thin. Maybe a trade of some sort? Lots of wires disconnected. Found the lighter works if I connect the ground. Will get some labels for wires and contacts. Have labeled and disconnected the lower console piece. A previous owner decided the switches wouldn't stay I without epoxy, so it took some effort to remove them. The switch labels are all but gone. Will have to find a way to renew them. They cost a bundle to replace. Took the radio plate to a local radio shop to see what would fit without cutting. Just a basic cassette deck was all. Had them cut the hole to fit newer radio chassis. Will bring it back after the refinish. Looking at a Jensen radio. Gotta go with that. Trying to clean the paint/stain off the leather sidepieces is proving to be difficult. Acetone won't dissolve this stuff much. Mineral spirits or lacquer thinner won't even touch it. Finally tried denatured alcohol and that did a good job. Did a good job on my hands too. Can't get all the black off but I think it'll be OK for re-dying. No way to ever bring back the original color I think. So after a couple of hours they look OK The wood veneered pieces need to be redone. Have submitted a question to the group asking for tips. Replies were anywhere from using a wood chisel or putty knife to sending it off to a place in California, which charges almost $400 to refinish. I decided to use a belt sander. The front wheel was nice to use on the curved part. Took it off pretty well I think. Covered everything in a fine dust. I think next time I'll try baking it. After sanding the top piece, I found some of the veneer flaking off easily. May have been hot enough to destroy the glue? Not sure. Kind of Delorean looking. Speaking of Delorean, I have a friend who has all the service bulletins and parts books for those beasts. Contact me if interested. Have begun trying to get the blower and other electrical items working. I'm using a great tool, which is very handy in finding where a wire terminates. I connect one end to the wire, and use the probe to sense the other end. It makes a tone when close to the far end. Very handy. I'll have to get one for my personal kit. Got my new Edelbrock carb in the mail. Looks good so far. Will install when the garage is cooler. July 12 -13 Decided to do something I might have more luck with. Installed the new carb. A few gotchas with the bracketing but was able to over come them. Had to re-drill the throttle cable mount point after it interfered with the valve cover on WOT. The new location made the throttle a little more touchy. Anyway, the beast fired up right away and ran pretty smoothly. Took it out to see and found the shift points all messed up. Put it back in the garage, changed out the metering rods and main jets. Left the secondary as they came from the factory. Runs a bit better now. Hard to describe what I'm feeling as I accelerate though. Guess I would say it feels dull, almost like I'm not getting full throttle. The pedal does move the linkage all the way though. Realigned the kick-down bar and shifting is much better now. Still needs some adjustment though. Doesn't seem to kick down from third very easily. Again I'll wait till it's cooler to do much more testing. It's going to be near 100 all week. Spent some time flattening out the veneer for the dash. Used 2 oz glycerin to 32 oz water as suggested, dampened the veneer and pressed it flat with a pile of bricks. Probably should have parked my car on top of it though. Three days later it was pretty flat. The problem with that is when I brushed on the contact cement, it warped again. Just more pressure when applying the veneer, right? The roller I bought trashed a bearing almost right off the bat, so I was forced to use just my hands. Worked OK but it took me an hour of close work to get it to lie flat on the metal. I think next time if there is a next time, I'll look for a thicker veneer that isn't a prone to warping. Anyway, now I have to figure out the best way to trim this with out taking chunks out of the edged. I think I'll experiment with a roto-zip tool. Have ordered the Mopar Performance Electronic Ignition Conversion, and an MSD Blaster coil from Jegs. Should be here by the weekend. Dean at Andy's Automotive never did order this for me. Guess I'll learn about this too. July 19 - 20 Received the distributor on Thursday. Started early Saturday to install. Was able to find a spot on the right front near the radiator with two bolts in just the right spacing to mount the coil. ) The MSD Blaster 2 needs to be mounted vertically) Also a convenient spot in the right front to mount the module. Made all connections according to the directions. The wires want to lie in rather nicely. Needed a longer coil wire to reach from the new location. What a pain in the butt. Can't find one anywhere. The wire needs to be about 44 inches, all I can find is 17. I'm beginning to wonder why parts house people seem to have an attitude. When asking for a long generic coil wire, a counter person at a NAPA store reminded me in no uncertain terms that there are many different cars and models on the road today. I assured her that I was aware of this fact. Finally I found a coil wire at another parts house. After buying this and driving away I realized it was a plug wire. However the end was something I could use on an extra wire I already had. Got home and connected everything. Cranked the motor… Cranked some more, and some more. Pulled the coil wire and found I have spark there. Got a spark at the wires for about five seconds, at one point. The rest of the time no spark at the plugs. Power in, no power out. The air gap is right. Checked that twice. Checked all wires several times. Still no spark. Too hot this afternoon, called it a day. Sunday AM. Called Jegs.com for support. The tech had me check a few things before finding that the coil output to the distributor is about 1.5 volts. Not good. Sending the parts back and getting a new setup. Going for getting the blower motor running again today. Decided to try some new power to the inside of the car. Drilled anew access hole on the right side of the dash behind the glove box. Fed a heavy power cable, the antenna lead, and two smaller wires. Used on of the two smaller wires for the blower motor. Connected the circuit to the motor under the hood and the other end to the demist switch on the dash. Figured I'd probably never get the demist working anytime soon. The fan runs strong. After a computer support session I thought, why not attach these leads to the original switch. After some checking, I found that attaching my wires to two of the switch contacts would turn on the blower. RAM turns on full, fan1 turns on about half and fan2 turns on a sleight breeze. Seems backwards to me but it works. Checked the voltage at the switch and found the RAM putting out 12 volts, the Fan1 is about 7 volts and Fan2 is about 1.5 volts. The center dash pieces are getting to look pretty good. The clear coat is nice and I was able to get the veneer to lay down and cooperate. The wrinkle paint is looking good on the shifter bezel. Cut the sight shield today and drilled the hole for the shifter. Looks good. Don't know if I mentioned it before, but this piece of plastic is a piece from a Honda nose mask. 07/22/03 07/26/03 I finally found a good seal for the sunroof. Home depot has some smaller diameter half round adhesive weather stripping that worked beautifully. Filled the gap just right. Looks like it'll stop water and wind noise. Cost about $6. Replaced the rear speakers today with some speakers taken out of my CR-V when it was new. Instructions here. Looks like I'm at least the third person in here. Now that I know how to get in there, it'll be easier to upgrade when I can afford better speakers. Will have to do the front speakers soon. Started to fix the under hood snake light. Cleaned the contacts and tested. Appears to be OK, just no voltage at the connections to the loom. Took the paint and rust off the panel above the radiator also. Will refinish with the same wrinkle paint as on the shifter bezel. Hope it can take the heat. Put the visors back in. They look pretty decent considering. The dye I used is definitely a different shade of black than the current dye. It's OK as long as it's not on the same panel. A month ago I swapped out my Carter for an Edelbrock 1406. Fine and dandy. Still needed to adjust a bit for altitude but running. Two weeks ago I replaced the distributor with a Mopar electronic conversion. The first one I put in had a dead module and produced no spark at the plugs. The second one seems to be OK. It get spark out to the plugs but it just won't fire up. I put cyl. 1 at TDC and hand cranked the engine to be sure it was lined up just so. The distributor is not 180 off and wire one is where it supposed to be along with the correct firing order established. Still no fire in the cylinders. It acts like it has no spark but I see spark when I pull plug wires. Fuel is flowing as I occasionally get a small backfire (not sure why that's igniting) and I can see the fuel going down the throat of the carb. I located the coil and module in the right front corner of the engine compartment and used a 36-inch coil wire. Could that be too long? http://www.bitstream.us/jensen/pics1/pics10/1305.jpg (large pic 325K) Could it be that the spark at the plug is just not hot enough? Something with the alternator? |